


Photographic Evidence in Checkout Reports: How Cleaning Standards Are Measured
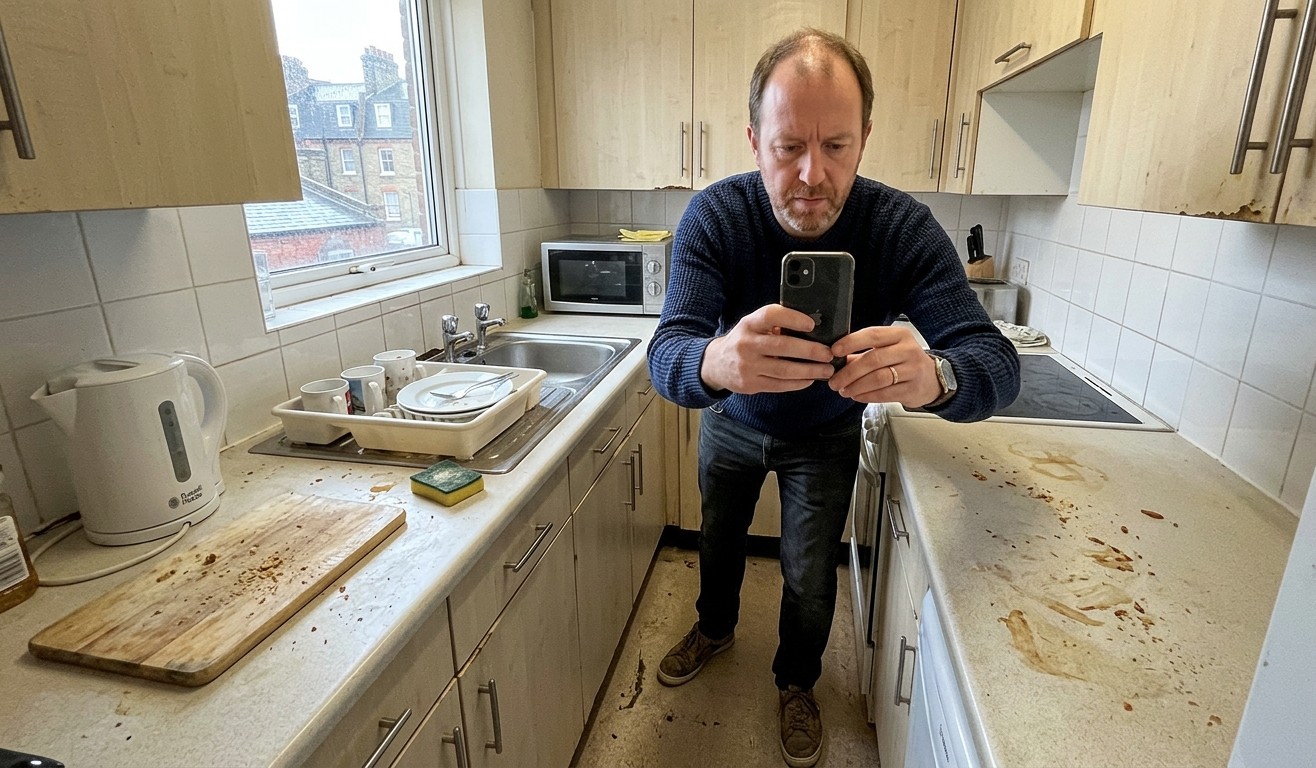
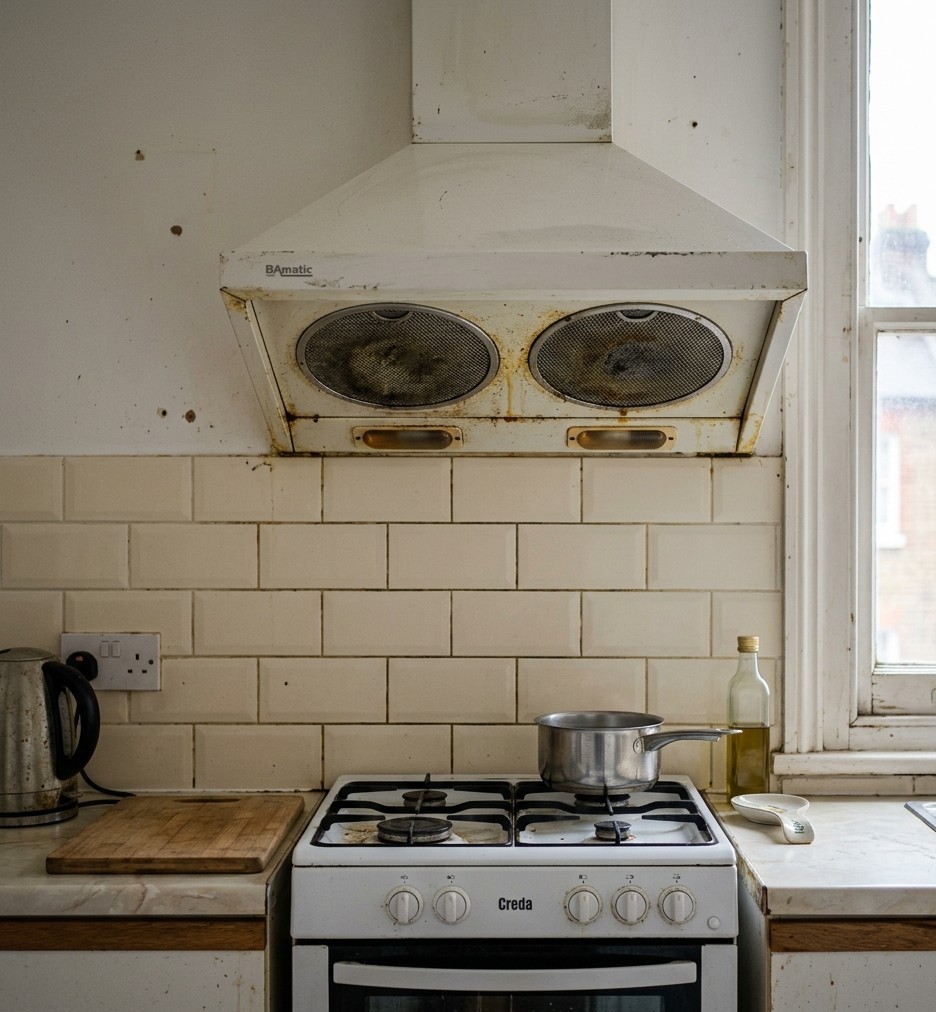
There’s a moment, familiar to anyone who has ever disputed a deposit deduction, that feels distinctly like being in a courtroom drama. The letting agent produces a photograph. You look at it. You recognise the kitchen – your kitchen, or at least it was until last Tuesday. And there, in high resolution and pitiless natural […]